
If you are producing a long video, you may want to add bookmarks to help your viewers find the content they are looking for. For example, if recording a training session based on one of ASCENT’s learning guides, we might add bookmarks to indicate the start of chapters and practices so they are easy to jump to.
Camtasia makes this process easy with markers.
Adding Markers in Camtasia
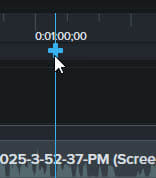
So how do you add a marker to your project in Camtasia? Simply move the playhead in the timeline to the desired location and press <Shift>+<M>. You can also click when you see the blue line in your timeline.
This will add a timeline marker to your project – these markers always remain in their original location on the timeline and will not move with your media as you edit your project. If you want the marker to move with your content, you need to change it to a media marker. To do this, click the plus icon down on your media track rather than at the top of the timeline.
If you have an existing timeline marker, you can simply hover over it and click the plus icon on your media to convert it.

In either case, be sure to rename your marker so you know what it is indicating (select the marker, type in a new name in the Properties panel, and press <Enter>). If you are planning to use the markers to create a table of contents, make sure it’s something your audience will recognize as well. 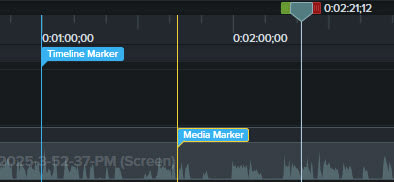
Tip: You can also add markers to your content as you are recording it by pressing <Ctrl>+<M> during recording.
Turning Off Markers
If you aren’t planning to add markers to your project, you may want to turn them off, especially if you’re doing a lot of editing. Because it’s easy to add a marker accidentally by clicking the wrong spot, when you are trying to select part of the timeline or move the playhead.
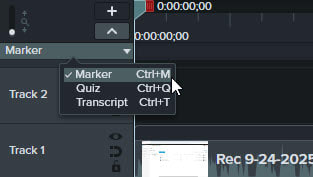
To turn off the Marker view (which will prevent you from adding markers by clicking), press <Ctrl>+<M>. You can also turn this off by expanding the drop-down menu at the beginning of the timeline and clicking Marker to deselect it.
If you decide you want to add a marker, pressing <Shift>+<M> will add a timeline marker and turn on the Marker view again. You can also select Marker in the drop-down menu or press <Ctrl>+<M> again to turn the view back on.
Uses for Markers
As mentioned above, you can use markers to indicate key points in your video that can then be exported with your project as a table of contents (be sure to select the correct export options for this). This can be helpful for your viewers if you have a long video with a number of topics, to let them jump to the one they are looking for.
You can also use markers to help with editing your project. Markers can be used to indicate errors or parts of the video that need to be edited during an initial review, then deleted as edits are made (simply select the marker in the timeline and press <Delete>).
Markers also make it easier to export sections of your timeline – adding markers at the start and end of each section lets you easily select each portion between the markers to export the selection separately. This is helpful if you’d like to split a long video into multiple shorter videos while still maintaining the recording as a whole.
About the Author
Follow on Linkedin More Content by Breanne MacDonald


