
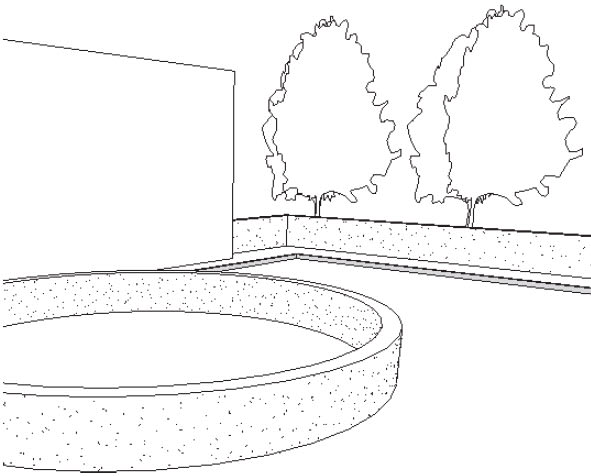
Creating hardscape features, such as retaining walls, planters, and curbing, can be done using Revit walls. Walls in Revit are more than just two lines on a plan. They are full 3D elements that store detailed information, including height, thickness, and materials. This means they are useful in 2D and 3D views. You can also add a profile sweep along the wall to adjust its shape to better suit the design.
Since Revit walls are system families, it is best practice to create these in your company template so they are available to use when starting a new project. You can also use the Transfer Standards tool to transfer the wall types into a project.
How to create hardscape types in Revit:
- In the Architecture tab>Build panel, click Wall.
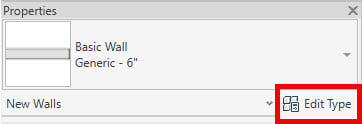
- In Properties, expand the Type Selector and select one of the wall types that is the closest to the type you are trying to create, like the Generic – 6” Basic Wall type, as shown in the image below, and click Edit Type.
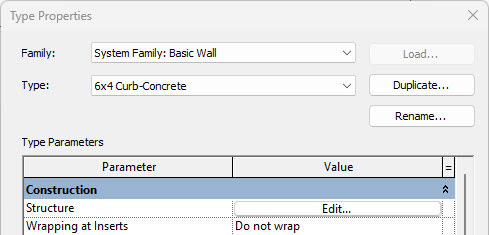
- In the Type Properties dialog box, click Duplicate….
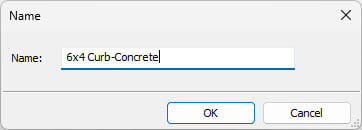
- In the Name dialog box, give your wall type a name and click OK.
- In the Type Parameters, click Edit… next to Structure.
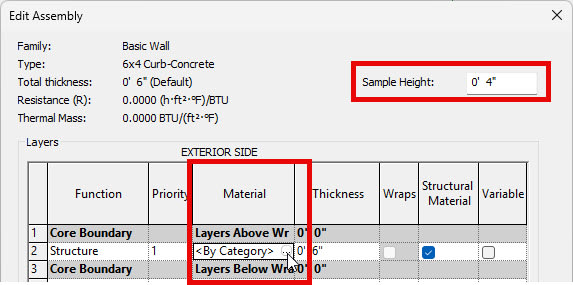
- In the Edit Assembly dialog box, under the Layers area, locate the Material column. Edit the material used for Structure by clicking on <By Category> and then clicking the browse button that displays, as shown below.
- Edit Sample Height in the upper right corner to the height of your curbing. This is only for displaying this wall in the Preview panel and does not control the height at which you would draw this specific wall in the model.
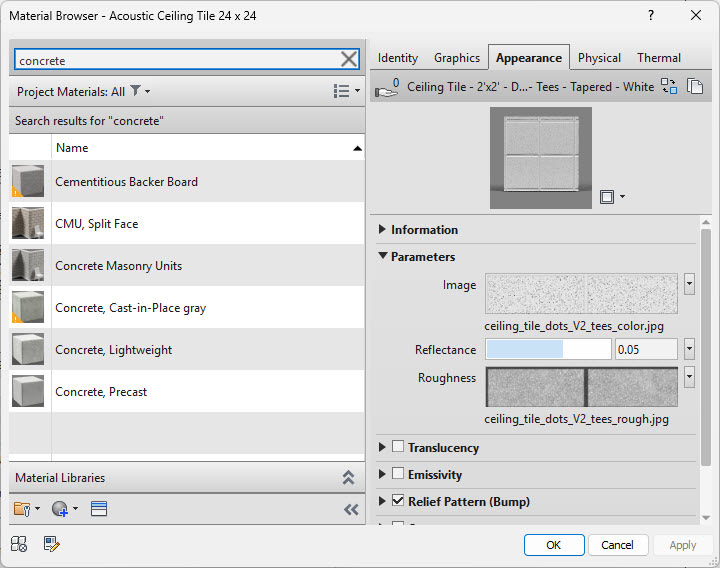
- In the Material Browser dialog box, you can search for the material you need and select it and click OK.
- To create a curved or peak curbing, you can add a sweep. Revit does not come with profiles specific to landscape design, so you will need to understand how to modify or create families to create sweeps specifically for landscaping.
- At the bottom of the Edit Assembly dialog box, click Preview.
- Set View: to Section: Modify type attribute as shown below. You will now see your wall type in the Preview panel as shown below.

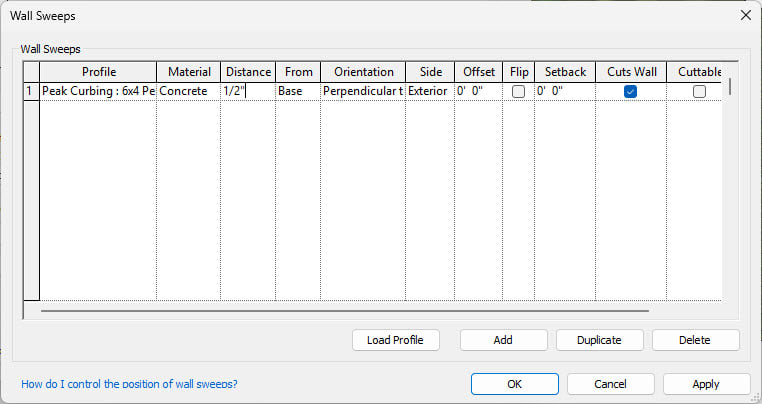
- Click Sweeps and, in the Wall Sweeps dialog box, click Load Profile to load in your custom profile. In this demonstration, I will use a Peak profile that I created.
- Click Add, which adds a line in the Wall Sweeps section.
- In the Profile column, click to expand Default and select your loaded profile. Ensure that Material is set to the same material used in your custom curb for consistency. Then, set the remaining properties for positioning as shown below and click OK.
- Click OK in the Edit Assembly and Type Properties dialog box.
- Draw your new curbing, making sure that in the Properties panel, you set Top Constraint to Unconnected. Then, set the Unconnected Height field to the height you want your curbing to be.

You can use Revit walls in creative ways to model not just building enclosures but also features like custom curbs, planters, retaining walls, and much more. Save these wall types to your template for future projects and experiment with profiles and materials to add detail and consistency to your site designs. Want more landscaping techniques? Take a look at the Autodesk Revit 2024: Fundamentals for Landscape Design book.
About the Author
Follow on Linkedin More Content by Cherisse Biddulph


