

Here at ASCENT, we write a lot of ‘how-to’ blogs showing you tips and tricks for how to perform different tasks in various software. Sometimes these can be hard to illustrate using static images unless you use a lot of them. Instead, consider using an animated GIF to illustrate the process.
Before you begin, be sure to confirm that whatever platform you may be using can properly support animated GIFs. Here’s how you can do it using Snagit.
-
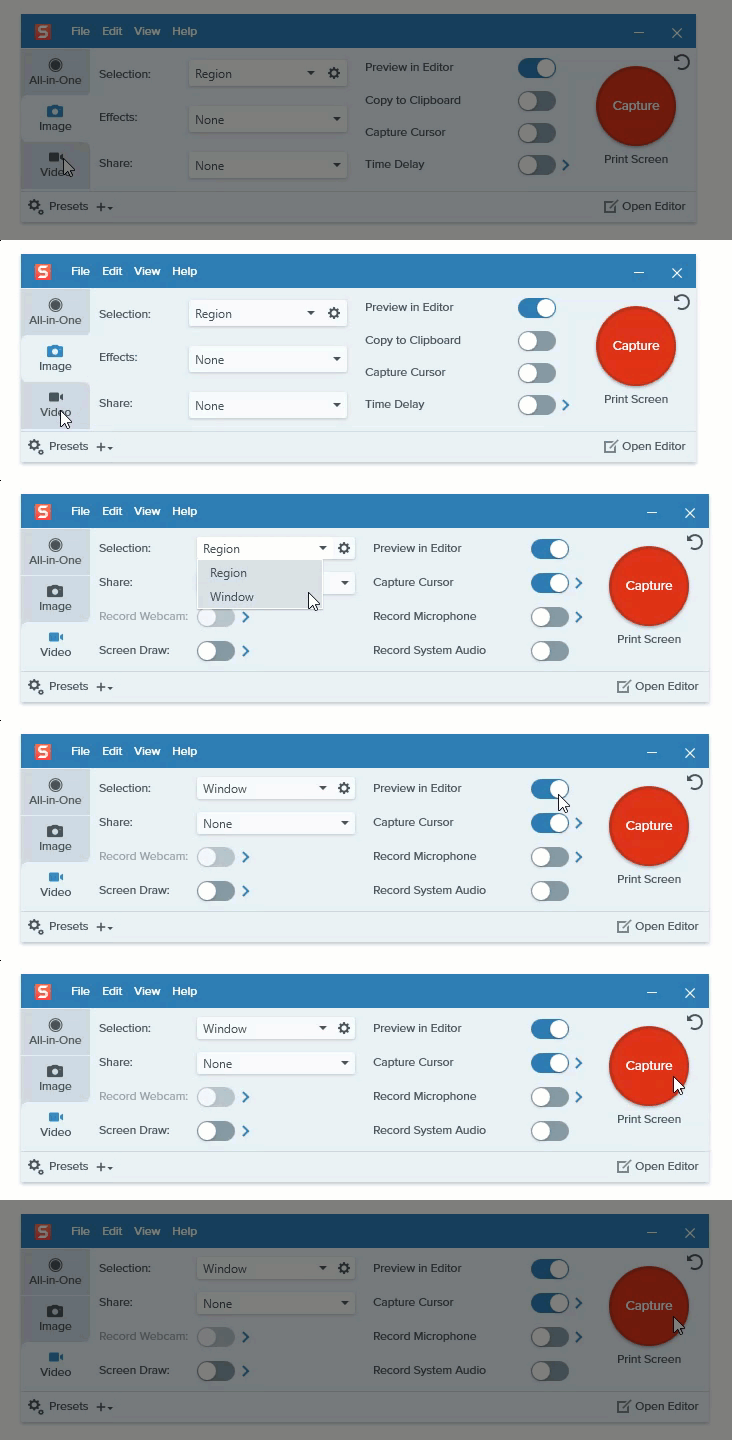
Open Snagit. If you have the Snagit Editor open, click Capture.
-
Select the Video tab.
-
In the Selection drop-down list, select Window or Region.
-
-
Window enables you to select a specific window or dialog box.
-
-
-
Region enables you to draw a box to capture a region of your screen. This is useful if you need to capture multiple windows/dialog boxes at the same time but don’t want to capture your entire screen.
-
-
If you want to capture your cursor in the recording, ensure Capture Cursor is toggled on.
-
If you want the option to draw on the screen as you are recording, you can toggle on the Screen Draw option. These tools can also be opened once the recording interface opens.
-
Click Capture.
-
Select the region or window of your screen you want to record.
-
In the recording toolbar, you can select different options for your cursor and adjust any of the settings. Click Record when ready to start recording.
-
Perform the steps of your process as you normally would. Keep in mind that only the selected region will be captured; anything outside of that region will not be seen, so if your cursor moves outside the area, it will disappear from the recording.
-
You can click Pause recording then restart the recording as needed. You can edit the clip later, so if you make a mistake, pausing and restarting may be better than starting over.
-
When finished recording, click Stop recording.
-
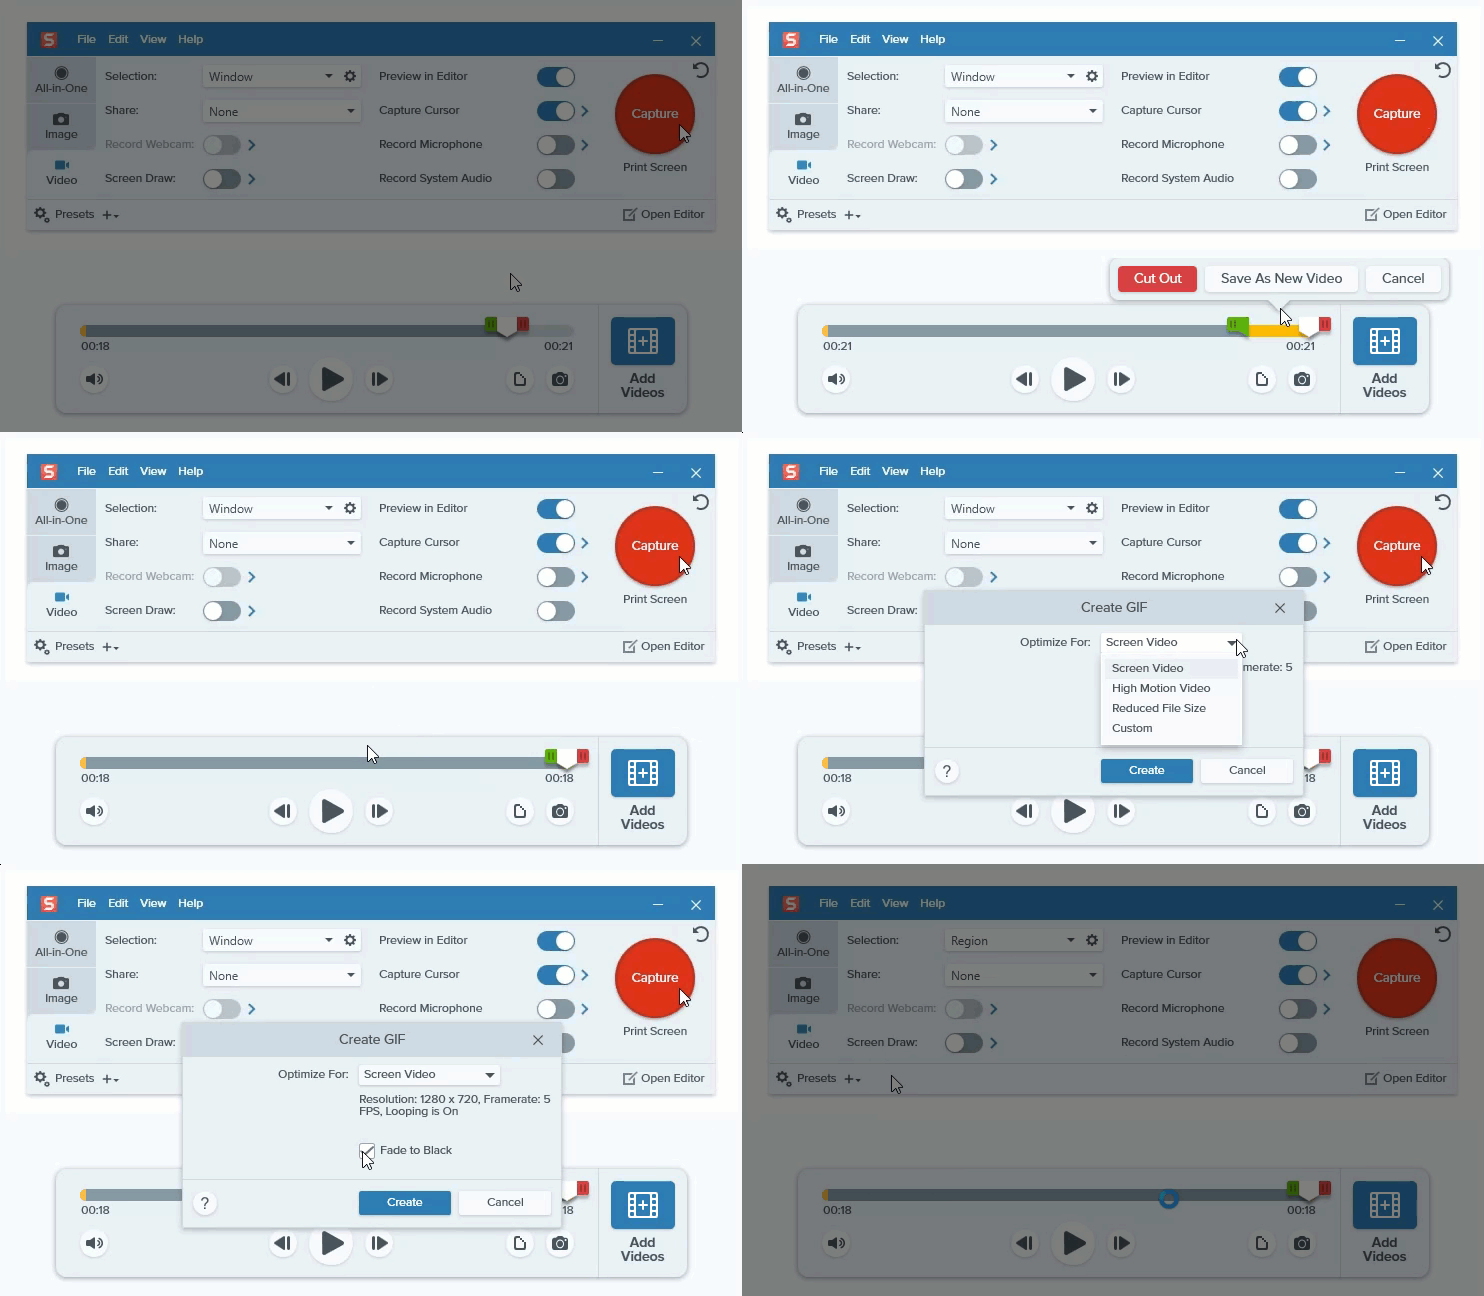
The .mp4 of the recording will open in Snagit Editor with a video editing toolbar. You can drag the end of the playhead to select a section and select either Cut Out to delete the section or Save As New Video to save it as a separate clip.
-
When happy with the recording, click Save video or selection as animated GIF.
-
In the Create GIF dialog box, select an option in the Optimize For drop-down list. If desired, select the Fade to Black option (so that your GIF fades to black before restarting), then click Create.
I hope you found this helpful for creating your own animated GIFs!
About the Author
Follow on Linkedin More Content by Breanne MacDonald


