
This is the second part of a three-part blog series covering the new Civil 3D objects for stormwater controls, which were introduced in the recent Autodesk Civil 3D 2026.1 release.
Ponds occur naturally as small bodies of water, but they are also designed and created as an effective means to capture and control stormwater runoffs. They can be fed by channels or storm sewer outfalls. Ponds are designed to capture significant volumes of water, which they can either retain or discharge at a controlled rate using different methods, to maintain an optimum water level.
As they hold stormwater runoffs for a length of time, they effectively can remove contaminants and sediment before releasing the water through weirs, orifices or some other type of discharge.
Creating a pond
Civil 3D provides three methods for creating ponds:
- Sketching the pond outline.
- Picking an outline from an existing polyline, feature line, alignment parcel segment, or survey figure.
- From a surface: You either need to specify the top elevation of the pond and Civil 3D will find all depressions in the surface rimming at that elevation, or you can pick a closed contour that is the top of a pond.
When creating a pond, the following is required:
- Name
- Description (optional)
- Depth
- Inside Slope
- The starting elevation (either Top or Bottom elevation)
- The Layer it resides on
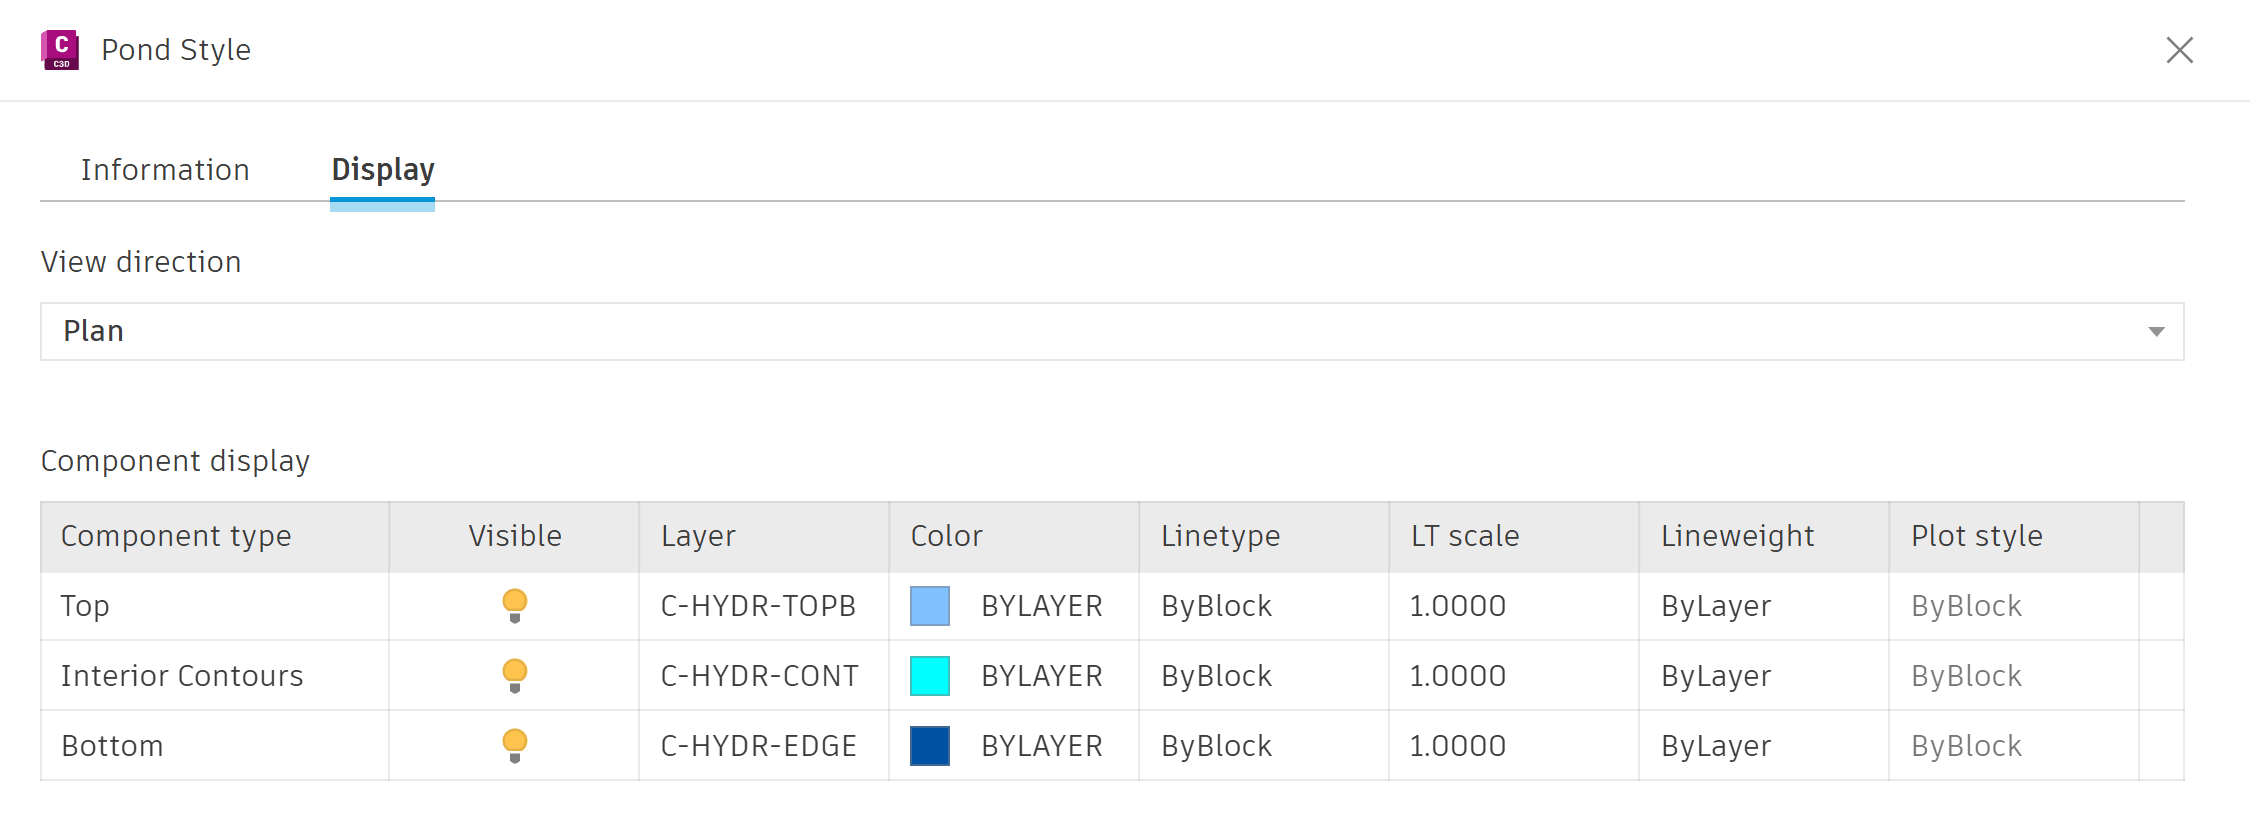
- The Pond Style
The Pond style controls the settings for its Top, Interior Contours, and its Bottom.
Pipes from the gravity pipe network and channels can connect to a pond. These will then appear on the Inflows tab of the Pond Properties dialog box. However, the connection is not dynamic; when moving the pond in plan or elevation, the connected pipe or channel can get disconnected, If this happens, a warning will appear in the Event Viewer.
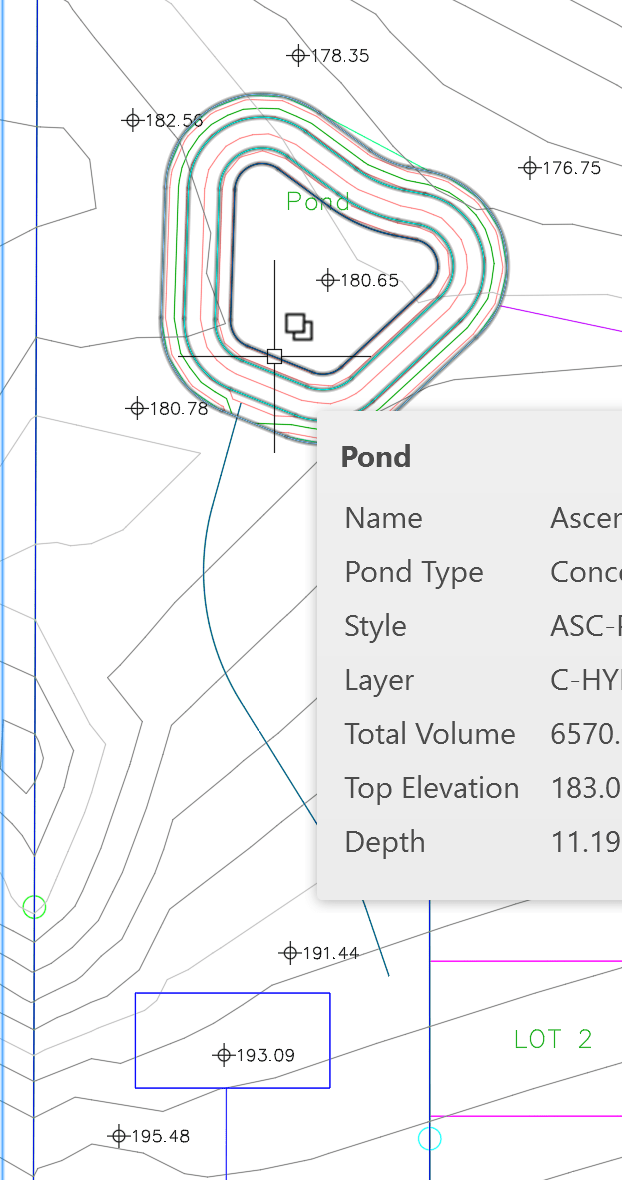
Pond edits and properties
Once a pond is defined, it can be refined through grips. When hovering over them, the tooltips allow you to insert, stretch or delete vertices, and insert curves. A diamond grip at the centroid of the pond allows you to change the elevation or provide an offset in elevation.
Furthermore, there are tools within the contextual ribbon.

The Pond Properties window displays the properties of the pond and is divided into four categories:
- Information
- Storage
- Inflows: Displays relevant information about pipes connected to the pond, such as Description, Size, Invert-, Centerline- and Crown Elevations and Slope, as well as the structure at the other end of the pipe.
- Outflows: Similar to Inflows, this tab displays relevant information about pipes leaving the pond, such as Description, Size, Invert-, Centerline- and Crown Elevations and Slope, as well as the structure following the pipe. In the outlets section, you can specify the type of outlet (Weir, Orifice, Free discharge), its diameter, Invert Elevation and Coefficient of Discharge.
Quick Edit displays information about the Pond components, such as slopes / grades and widths, as you hover over them and allows you to change the values as you pick them.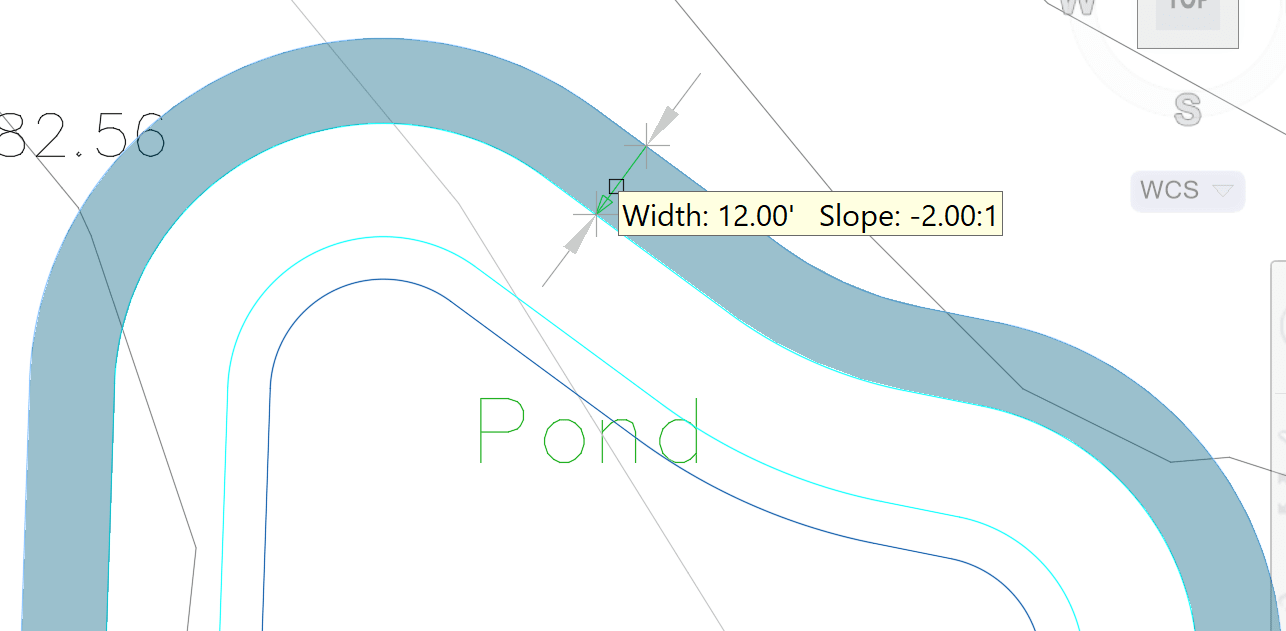
You can Add Side Slopes to the pond by clicking on a contour (top, bottom or intermittent) and picking the desired slope width. The new slope area is then highlighted in a blue shade.
Fillet Pond allows you to place curves between all vertices of the pond at a given radius.
Add Contours / Delete Contours allows you to add more contours to the pond or delete existing contours.
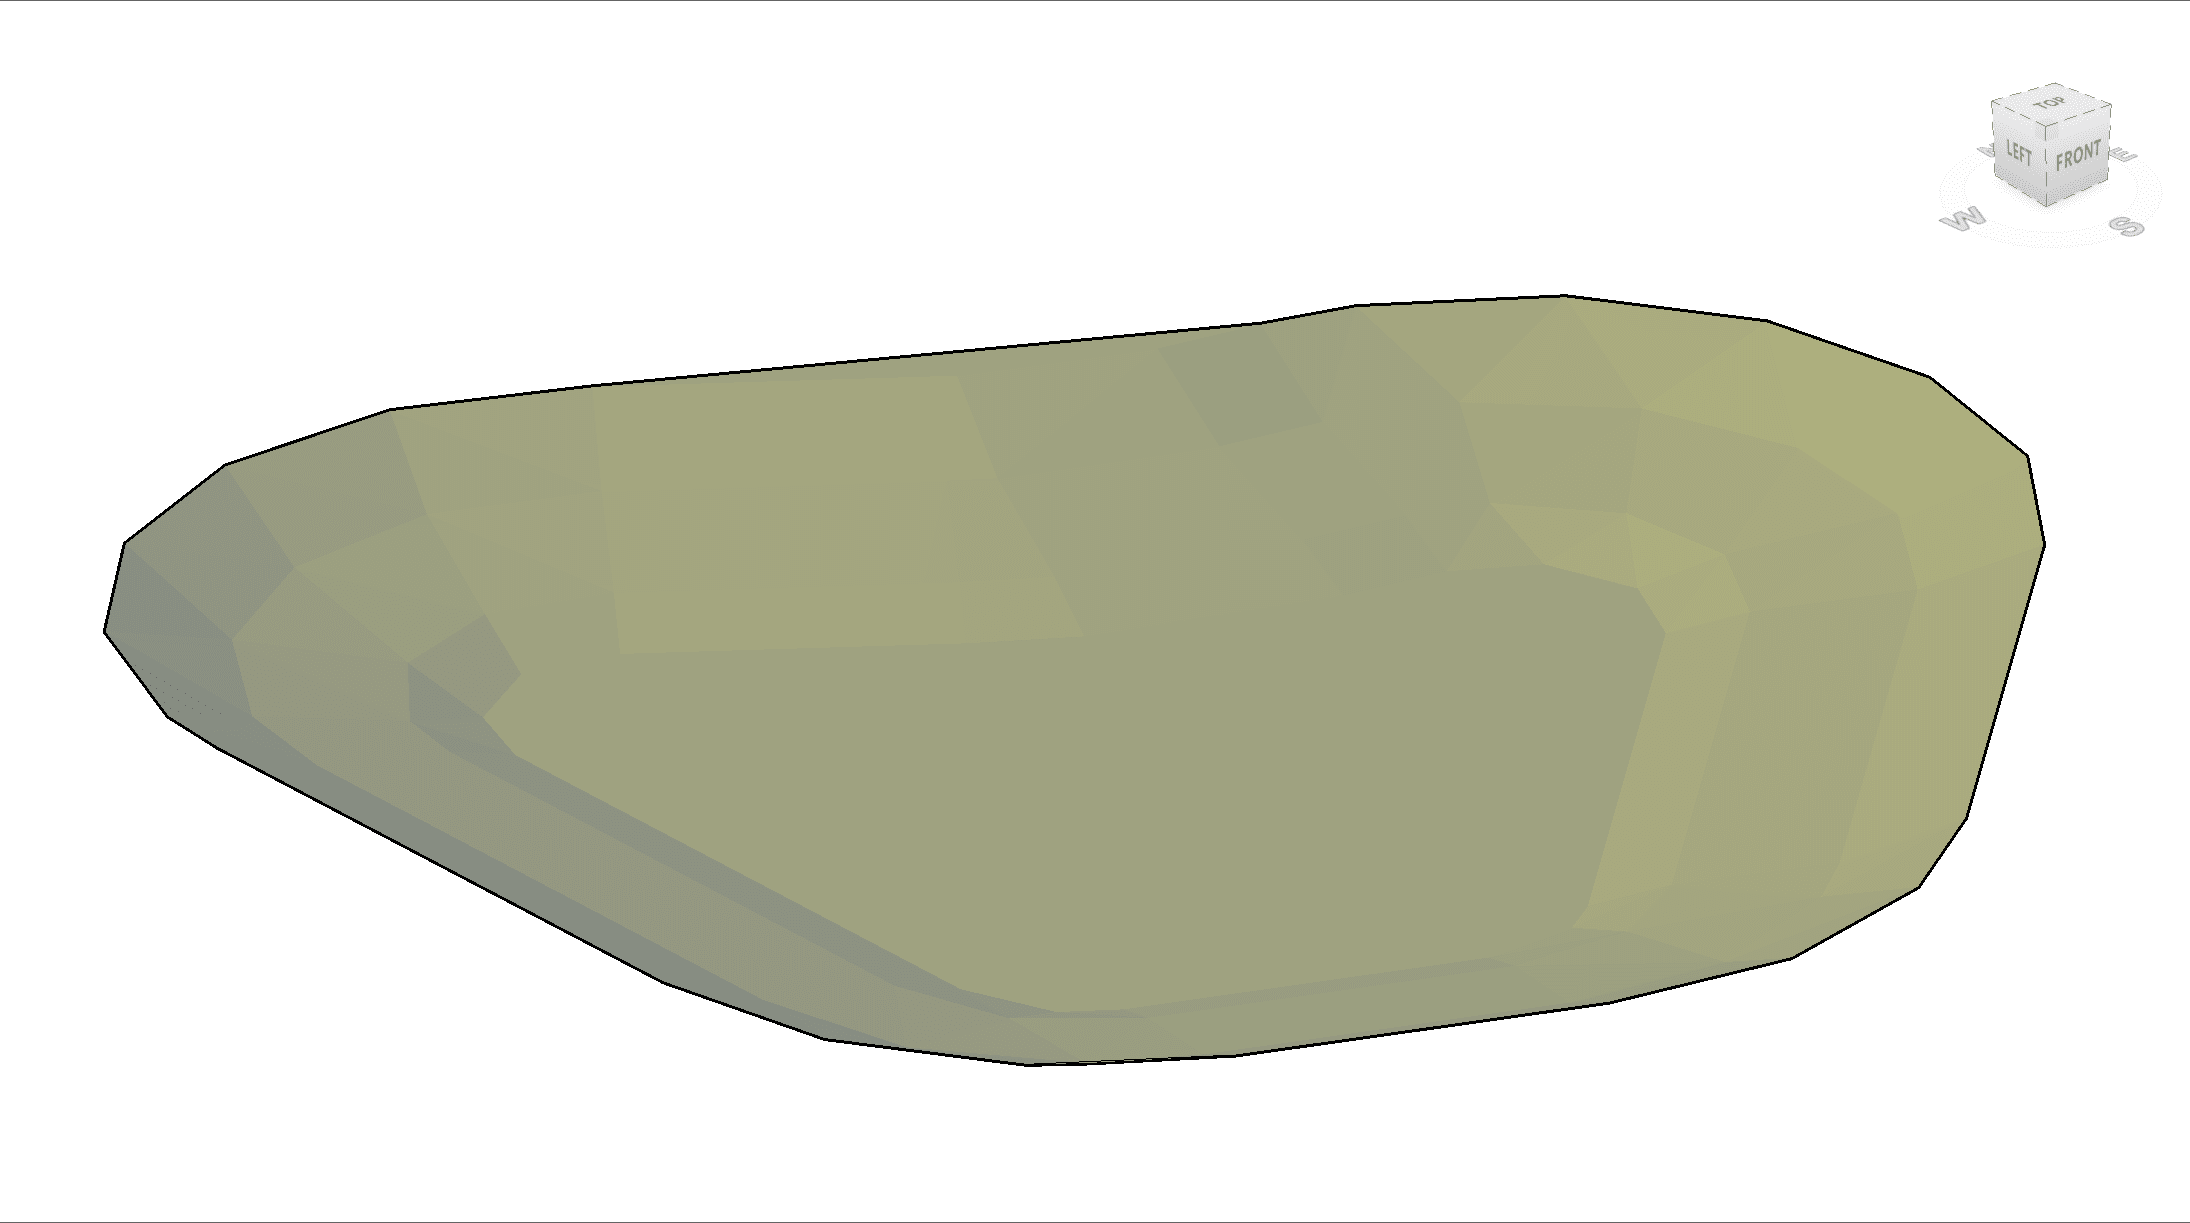
You can extract Feature Lines from Pond in order to create a surface for the pond. You can extract all the contours, or just the top and bottom ones. You can also create a dynamic link so the feature lines (and the resulting surface) will update as the pond is changed. If using Data Shortcuts, you can create a shortcut of the pond, and in a referenced drawing extract the feature lines and create the surface.
Ponds are one of the new stormwater control tools now available in Civil 3D, 2026.1 release. The first part of this blog series covers Channels and the third part covers Underground Storage Units.
About the Author
Follow on Linkedin More Content by Jeff Morris


