
If you have read my article Using Grips in AutoCAD - Part 1, you understand how using grips can help you to quickly and easily modify drawings without using an editing command. In this post, I am going to dive deeper into the versatility and efficiency that grips offer. Here you will learn about the advanced features of grips such as changing the base point, copying objects using grips, leveraging the reference option, stretching multiple objects simultaneously, and manipulating the shape of an object, as shown in the figure below.
Changing the Base Point using Grips
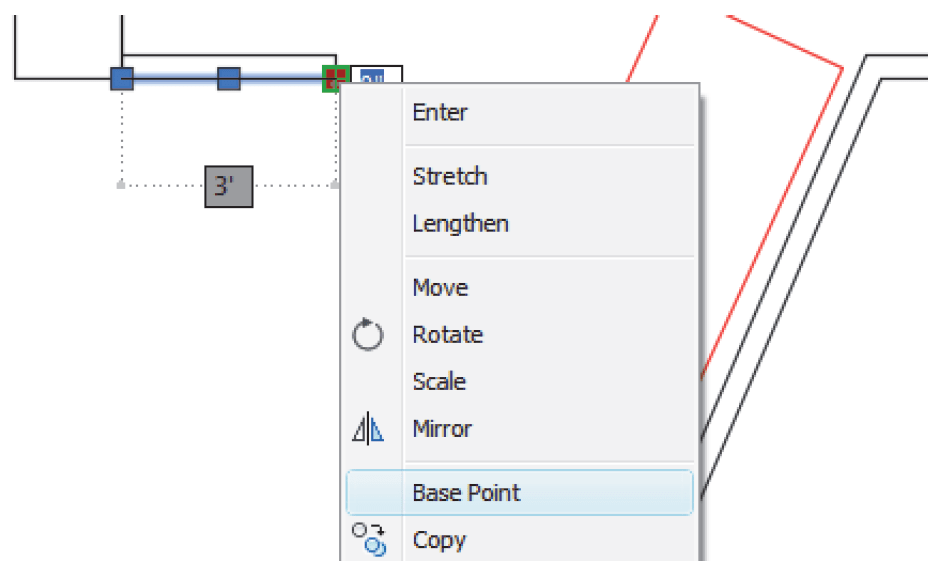
The hot grip becomes the default base point for moving, rotating, etc. To use a different base point, right-click and select Base Point (or type B in the Command Line). Select the new base point and continue with the command.
Copying with Grips
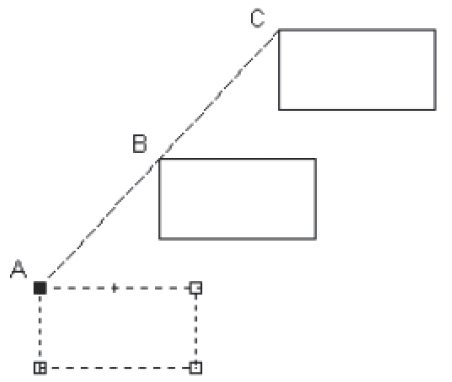
Use the Copy option with any of the grip editing modes to create multiple copies while you move, rotate, etc.
- Select the objects and make one grip hot.
- Right-click and select the editing mode (Stretch, Move, Rotate, etc.).
- Select the Copy option in the shortcut menu or Command Line.
- Select (or type) the second point, rotation angle, mirror line, or scale factor.
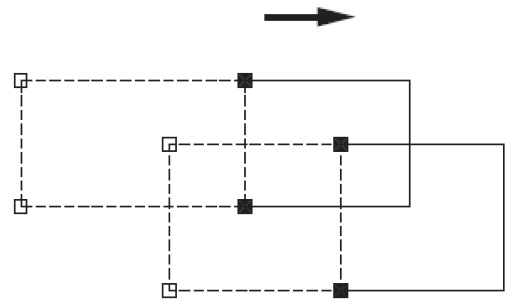
- If you hold <Ctrl> while selecting the location for additional copies, the new objects snap to the same spacing as the first copy, as shown in the figure below.
Rotate and Scale with the Reference Option
The Reference option enables you to select reference points in your drawing to describe the rotation angle or scale factor.
- Select the objects that you want to rotate or scale.
- Select the grip to be the base point for rotating or scaling.
- Right-click and select Rotate or Scale.
- Right-click and select Reference.
-For Rotate: Specify the reference angle by typing the angle or selecting two points. Specify the new angle by typing the angle or selecting a second point. The first point of the new angle is the base point.
-For Scale: Specify the reference length by typing the length or selecting two points. Specify the new length by typing the length or selecting a second point. The first point of the new length is the base point.
For example, you might want to straighten a rectangle that is rotated at an unknown angle, as shown in the figure below. Select the rectangle and then select the grip at point 1 as the base point for rotation. Right-click and select Rotate and Reference. For the Reference angle, select the end points at 1 and 2 (this is the current angle of the object). For the New angle, type 0. 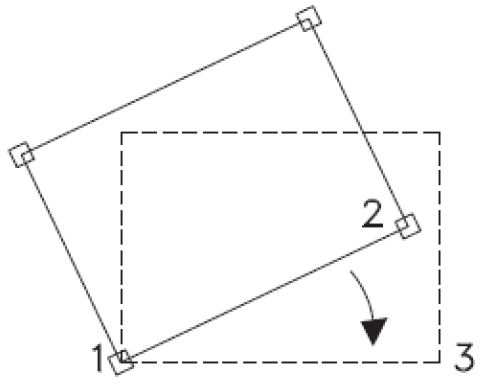
- The Reference option is also available with the regular Rotate and Scale commands.
Stretching Multiple Objects
In the Stretch mode, only hot grips or objects that contain hot grips are stretched. You can make multiple grips hot by holding <Shift> when selecting each grip, as shown in Figure below.
- Select the objects that you want to stretch.
- Hold <Shift> and select all of the grips that you want to move using Stretch.
- Release <Shift>.
- Select the grip that you want to use as a base point.
- Select the point that you want to use as the second point of displacement.
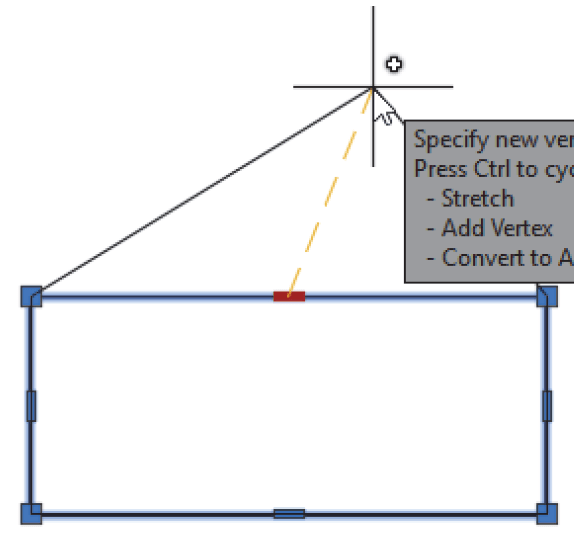
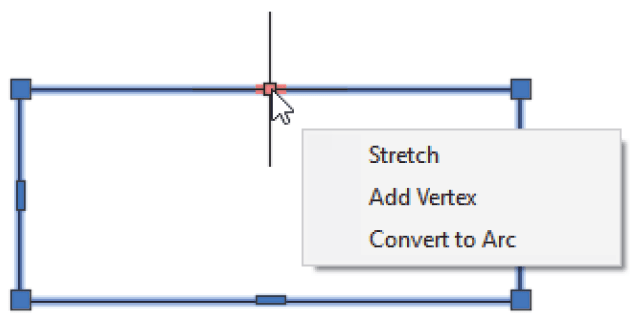
Changing the Shape of an Object
The multi-functional grips of certain objects (such as polylines) enable you to convert an object segment into an arc or an arc segment into a line.
- Select the object to display its multi-functional grips.
- Hover your cursor over the top middle bar grip to make it hot and display its multi-functional menu, as shown in the figure below. You can Stretch, Add Vertex, and Convert to Arc using the grip options.
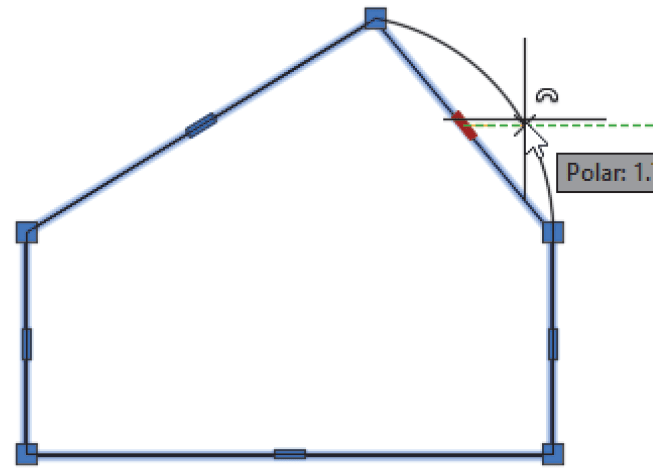
- Click Add Vertex and move that point to add a vertex and manipulate the shape of the object, as shown in the figure below.
- Hover your cursor over one of the bar grips and select Convert to Arc. Move the cursor to define the position and radius of the arc, as shown in the figure.
The advanced features of grips in AutoCAD are valuable tools that can significantly enhance your ability to edit and manipulate drawings with speed and precision. By incorporating these grip techniques into your daily drafting routine, you can achieve greater efficiency and flexibility in your AutoCAD projects.
The information in this blog is sourced from our AutoCAD 2026 Beyond the Basics learning guide, which is available through Amazon as well as the ASCENT eStore.
About the Author
Follow on Linkedin More Content by Renu Muthoo


